Showing posts with label projects. Show all posts

8/15/2011

what i love most about my home

Ah sorry to just disappear last week. I had a school final that I had to study and stress over but it's over with so now I can breath again. How was your weekend? We finally had rain here and that in itself made my weekend. I don't think we've had a good solid rain storm since May.

A while back I shared a little teaser of a wood stained painting that I did using Nicole's tutorial. We finally hung it up yesterday on a tiny blank wall and I thought I'd share the result. I'll be honest, my writing is not straight nor perfect and at first I let that bother me but now that I've been staring at it I think I like it that way, gives it a little more character (at least that's what I keep telling myself).


 The quote is a spin off of the quote 'What I love most about my home is who I share it with' first seen here in this design*sponge sneak peek. I was going to do the original quote but knew I was going to run out of room so I had to change it up a bit. Now it's a little more me I guess. :) 

7/07/2011

in the works

I have a couple of projects that I'm working on right now. Here is a little math equation to show you one...

 a bit of this fabric (flipped so the stripe is horizontal)

+

and this tutorial as a guide

=

hopefully will equal something like this skirt that I loved so much!


I'd love to know what you are currently working on!

5/26/2011

I am lucky enough to be part of an amazing organization made up of equally amazing woman who are all supporting their other half in medical school. We get together for different activites/social/service events and the other day we got together for a mini class on floral arranging. I've professed my love of (novice) flower arranging before, I enjoy it a LOT! I thought I'd count this as my monthly creative project.


I was happy to come home with this little arrangement I made using this great tape idea from Martha Stewart {via}. It made it really easy to use the shallower bowl I had on hand as a vase.


I am going to bid you happy weekend a day early! I'll see you back here next week friends!

5/23/2011

Dip-Dyed Stationery


One of my favorite things to do is buy and send pretty note cards. Happy mail makes my day. I'm always up for a diy so I naturally love this dip-dyed stationary from Martha which looks super easy and very customizable. Wouldn't it be pretty to dip some blank note cards in a light peachy-pink hue or maybe a grey like they did in the photo?

The How-To:

1. Fill plastic bin with hot water to a depth of at least 6 inches. Stir in rit dye, starting with a small amount and adding more as desired. Dip a sample strip of paper towel to test the color. If too dark, add water; if too light, add dye. Let solution settle, so there are no bubbles at the surface.

2. Holding your paper as straight as possible, dip into dye solution to desired line. Keep paper in dye until it turns the desired color. Hang to dry.

{photo, idea, and instructions - Martha Stewart}

4/20/2011

mashup

It's Wednesday...hump day...would a mid-week mashup make you feel better about that? The kidlets and I are off to the zoo so I'll leave you with these links of things I've seen around the blogosphere. I hope you have a lovely day!


:: I think I need to make and eat some chocolate dipped peanut butter eggs! Stat.

:: Apparently I wasn't the only one who thought galvanized buckets were a good option for Easter baskets.
 
:: Lets hope that Lauren Conrad's new project, the beauty department is more interesting than the last couple seasons of The Hills.
 
:: A pretty baby shower where everything coordinates, even the guests clothing. {via the eclectic life}

:: Candy apple red washer and dryer, octagon tile and utility sink - oh my! A lovely laundry room remodel.

4/15/2011

easter buckets

So in my quest to make something at least once a month this year, April's project was to make my kids some sort of Easter basket to put all their loot in. Of course I couldn't just buy them normal baskets, I had to find something a bit different. I am hoping that Olivia and Landon won't be self conscience with their buckets in a few years when they realize everyone at the Easter egg hunt has typical easter baskets and they have metal buckets...


When I found these galvanized buckets I wasn't sure what I wanted to do with them so I held onto them for a week or two. After thinking of some ideas I finally decided on a simple design of eggs nestled in grass. I'm really love how they turned out and I'm happy to report they worked beautifully at an egg hunt last weekend. I forgot to share last months project with you last month so I'll have to get around to taking a picture of it sometime this weekend.

I hope that you have an awesome weekend! Any fun plans?

2/25/2011

ruffled ribbon headband (+ giveaway)

If you've been reading for a while you might remember that one of my goals for the new year is to make/craft/create something at least once a month (you can see last months projects here and here). For February's project, my cute 20 year old niece Ashley commissioned me to make her some headbands. Ashley didn't give me any direction on what she wanted so I had to create something that I thought she'd like. I made a couple headbands but the one that I wanted to share today was this ruffled ribbon headband.


And! since I had extra materials, I thought I would make one to give away!

If you'd like to win this ruffled ribbon headband simply leave a comment. Perhaps telling me about your latest crafty project or if you haven't done one in a while, tell me what you'd like your next project to be.

I will randomly select a winner on Tuesday, March 1st!


Good luck and have a great weekend!

1/19/2011

hello dolly :: black apple doll


This little lady here was a labor of love. I mentioned a while back that I wanted to make Olivia a Black Apple Doll (using this free pattern) for Christmas. I started to make her the week of but then became really sick and didn't have it in me to finish. She unfortunately sat there for a couple of days until she was finally done. Better late than never though! I had a lot of fun making the doll for Olivia and am happy to see that she likes it.  It's always rewarding to see that a project you make for someone else is appreciated so it makes me excited to hear her talk about "my dolly", play with and give it hugs.

If you are interested in making one, I found this doll to be an easy project, easy to customize, and so cute! I can see myself making these for (girl) baby shower gifts.

1/06/2011

diy project : map art

A while back Alli posted about some map hearts she had come across and I have wanted to make one ever since. I love the idea of using maps because we are big into traveling around here and loved the idea of using locals that are special to our family. Almost a year later I finally got around to making one.  


This project was super simple and cost me next to nothing using some frames that were collecting dust in a closet. If you have maps lying around and don't want/need you could cut those up and use but since I didn't I found a place online where you can download maps for free. I decided to frame places we've lived thus far in our marriage. Once I found my locations, I had to measure the frame to see what size hearts would be best, then went into microsoft word to create a heart using the basic shapes tool and printed it off to use as my template. I then cut the maps out and glued them on some white cardstock. Done and done!

Since I love a good diy project I thought I'd share another photo of my most recent BIG project. :)


Landon at 6 weeks.

9/23/2010

vintage bookplate DIY

Style Me Pretty is a great resource for inspiration and while it is dedicated to weddings, it's easy to glean great ideas for parties, etc. They recently shared this fun idea in their newsletter that would work for pretty much any party by switching out the numbers for letters or other fun things.


Supplies:
- House Number(s): found at a hardware store or online for more vintage options
- 2 screws
- screwdriver
- vintage books

To Assemble:
Step 1: {prep} Remove pages from vintage book
Step 2: Place the House Number in the middle of the cover of the book
Step 3: Screw the House Number into book cover using screwdriver
Step 4: Repeat with other numbers to coordinate with number of tables at event

{Concept and Styling: Posh Paperie :: Photography: Jackie Wonders}

8/27/2010

postal birthday party

My sister in law had a birthday recently and since we couldn't be there to help celebrate her birthday, we thought we'd send a little something her way. That little something morphed into a birthday party in a box.

I had so much fun putting this kit together . I don't scrapbook but I do like pretty paper so I found some papers that I liked and took it from there. I sadly had to take this picture at night so I don't think the colors came out very true but I thought it all looked pretty together. If I'd had more time, I think I could've kept adding more things to the kit...


The kit included: paper bunting banner, set of note cards, birthday party in a box "instructions", cupcake toppers, candles, cupcake liners, a mini birthday card, and a pair of handmade earrings. {Not pictured is a cake mix.}

What is your most favorite things you've ever received or sent in the mail?

8/22/2010

vintage aqua + red room

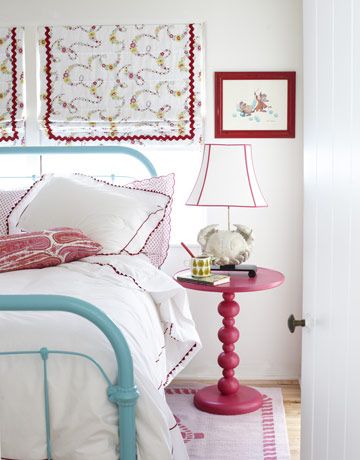
A while back I was visiting with my sister in law Jamie and we were discussing her desire to decorate her three year old's room. My niece's room also functions as a play room for herself and her two brother so there is need to keep it somewhat neutral. Jamie mentioned that she was thinking to use turquoise/aqua and red accents and when I came across this sweet room in House Beautiful designed by Krista Ewart I thought it was perfect inspiration.


I thought I'd play and have some fun by finding pieces I thought would be great in an aqua + red bedroom/playroom.

Since the room is on the smaller side and is also used as a playroom, I tried to keep things simple and basic but fun so my thoughts for this room are as follows:
  • This inexpensive Target Aqua Table Lamp rings in at about $20 bucks and would be great for a kid's room. 
  • A sweet Cavallini ABC "poster" for $4.50 echos the colors and vintage feel I was after (I posted about Cavallini here).  
  • I included these Charlie Harper bird prints that would be fun to hang on a gallery wall. (I hestitated to use these because they are no longer available for download from Cincinnati's Contemporary Arts Center but I thought if anyone was interested, feel free to email me and I'll send you the files.)
  • This Red Stripe Sofia Fabric at $8/yd would be great as a simple valance for the lone window in the room.  
  • I thought the Minnen Bed from Ikea was too cute and adds to the vintage feel (check out the bed in action here in last pic). 
  • Lastly, I loved this easy DIY Fabric Garland from me oh my that would be fun to hang pretty much anywhere in the room.

7/26/2010

A while back, I mentioned that I had made pickles. I've had a few inquiries so I thought I'd share how they turned out.
Never having made nor eaten homemade pickles before I'll be honest in saying that I'm not quite sure how exactly they are supposed to turn out (besides tasting like a pickle). That being said I thought they turned out pretty good! I only wish they had a bit more crunch to them but I'm sure that can be achieved with a little more practice/research. 

The dill pickle recipe I used came from tasty kitchen and found it to be really user friendly. We received a grocery sack of garden fresh cucumbers this weekend so I'm thinking of trying a different recipe. Here are a few I've found if you are interested...


On a related note...How perfect is this printed pickle jar from terrain? I might need it!

7/22/2010

Last week I set out to find some fabric to cover the cradle pad we will use for baby brother. I didn't have any specific ideas of what I wanted in regards to fabric except simple + clean. I ended up choosing a blue seersucker and I'm in love. (Please ignore the fact that it needs ironed and that my images are paltry.) Can I also say I never thought I'd be a cradle person but we used this one with Livi and loved it. It was actually the cradle that my husband used when he was a baby so it has a bit of meaning for us.

I am still trying to get used to 'boy things' having had 'girl things' in my mind for the last couple of years. When we were shopping for the fabric, my sweet shopping companion, Livi kept commenting on all the pretty fabric, "ooh pretty!' Thank you my dear but that is not very helpful when looking for boyish/manly fabric. :)


Oh! and see that cute blanket? A couple months ago I won a giveaway on Shelter from Pixie Dust Decor, a textile and decor design shop. It was right after I found out I was pregnant and wasn't sure what I was having. I had a hard time deciding on a fabric choice but ended up with the aqua lattice blanket. I love it! I like that you can use their fabrics to mix + match and create a custom nursery or give a great gift.

6/14/2010

getting organized


I'm notorious for hanging onto magazine articles, photos or other random things but doing nothing with them but let them collect dust. It drives my husband crazy (don't blame him). I finally decided to do something about it and have been scanning in the tear sheets I've pulled from my design mags. I've also decided to write down what aspects of the room appeal to me in an effort to try and hone in my design style. I've also been using my tumblr and interior tuesday as a sort of e-file for images.

Do you pull design images (or recipes, or articles, etc.) from magazines? If so, what do you do with them?

3/31/2010

honey, you're too cute

i have a never ending list of sewing projects but i never seem to get around to actually doing them. one of those project was using Susan's tutorial to make a skirt for Olivia. i can now happily cross it off my list because i finally got around to making it. hooray! i picked up this honeycomb fabric and i love it! next on the list, making one for myself.


2/23/2010

i'm not one to really go all out on holiday decorations, especially for the smaller ones, so i kind of surprised myself the other day when i decided to make a banner for st. patrick's day.


i came across this green floral paper in my scrap box and felt it a shame for it to just sit in the box. i like that it's not your typical st. patrick's day decoration (whatever that is).  for this banner, instead of attaching the paper to ribbon i decided to try something new and sew them together. i love the outcome and it was fun experimenting. if you have a sewing machine you should totally try it!


on the thoughts luck, i have to say i feel very lucky to hang out with this monkey every day. she's always on the go (as evidenced by the blurry photo) and keeps me on my toes but i love it.

what are you feeling lucky about? do tell!

2/07/2010

a bit of sewing

hey ya'll! did you have a great weekend?  mine was good but went by too quickly. i was able to work on a sewing project though! i've missed my sewing machine.

if you've been reading for a while you might remember the inspiration boards that i made for my little Olivia's room and this pillow from the second board.


i've liked this pillow ever since i spotted it at Pier 1 and when i saw that Caroline used it in her daughter's adorable nursury i liked it even better. however, on a stop to Cost Plus World Market  the other day i came across these cloth napkins which are pretty similar in color to the original pillow so i picked one up. i used some green ikea fabric i had for the back of the bigger pillow. for the bird pillow, i folded a placemat from Pier 1 in half and stitched it closed. with a little bit of the cloth napkin left over i made some little pillows for O's chairs. so... for a total of $10 bucks and four pillows i'm happy with the result.

1/15/2010

hip hip...


i was going through my paper downloads file and came across this cute little number from up up creative. i've been saving it thinking i'd use it for a party but such an occasion just hasn't come up yet. so instead i thought it'd be a welcome addition to our bare bones rental space by my little's crib. who doesn't want a little hooray in their day?

12/30/2009

olive & a : the files

so i decided to start a Tumblr. one where i can put all the pretty inspiring pictures i come across that make my heart beat a little bit faster. it's my digital version of an inspiration file folder, except there are no scissors or magazines involved. i'd love for you to take a look here.

Related Posts Plugin for WordPress, Blogger...